How to use Postmark as your SMTP email provider with Mastodon

If you are looking to start hosting your own Mastodon server (or already started hosting one!) then you may have come across the need for an email provider or SMTP server. In fact, Mastodon’s getting started documentation lists an email provider as a required service that you should have in place before beginning the process of running your own Mastodon server. Many “one-click” Mastodon installers such as Digital Ocean’s will even prompt you for SMTP server credentials during the setup process.
Why use an email service provider with Mastodon? #
Email plays a crucial role when running a Mastodon instance. For example, users will receive their signup confirmations or password reset links via email—and you need an SMTP server, because if those messages don’t make it to the inbox, your users will be stuck! We don’t want that to happen. And folks will want to know about new followers, too! You’ll have to make sure your Mastodon instance can send these emails fast and reliably—and you’ll need an SMTP server to make that happen.
It is certainly possible to run your own SMTP server, but this can be a daunting process and will likely take valuable time away from running your Mastodon instance and community.
By choosing an email provider like Postmark as your SMTP provider rather than running your own SMTP server, you can rely on the email provider to support the uptime and deliverability needed so that your Mastodon instance can deliver important emails in a timely fashion. Most email providers, including Postmark, also provide a dashboard that you can use to view detailed email history. This can be very valuable when trying to troubleshoot what happened to an email that is being reported as not delivered or if your Mastodon instance is having overall email delivery issues. To learn more about SMTP, including the pros and cons of running your own SMTP server, please check out our handy guide about all things SMTP.
How to use Postmark as your SMTP provider #
Before getting started with Mastodon, you’ll need to get your Postmark account ready for sending. Here’s how:
- Sign up for a Postmark account. You’ll automatically be on our free developer plan that will let you send up to 100 emails a month for free. Now, make sure you’re getting your account approved.
- Set up your Sender Signature—that’s the email address Postmark will use as the “from” name when sending your emails.
- Although it is not a requirement, we also recommend creating a new Postmark Server and/or Message Stream for your Mastodon instance. This will make it easier to find messages related to your Mastodon instance in the Postmark dashboard in the future.
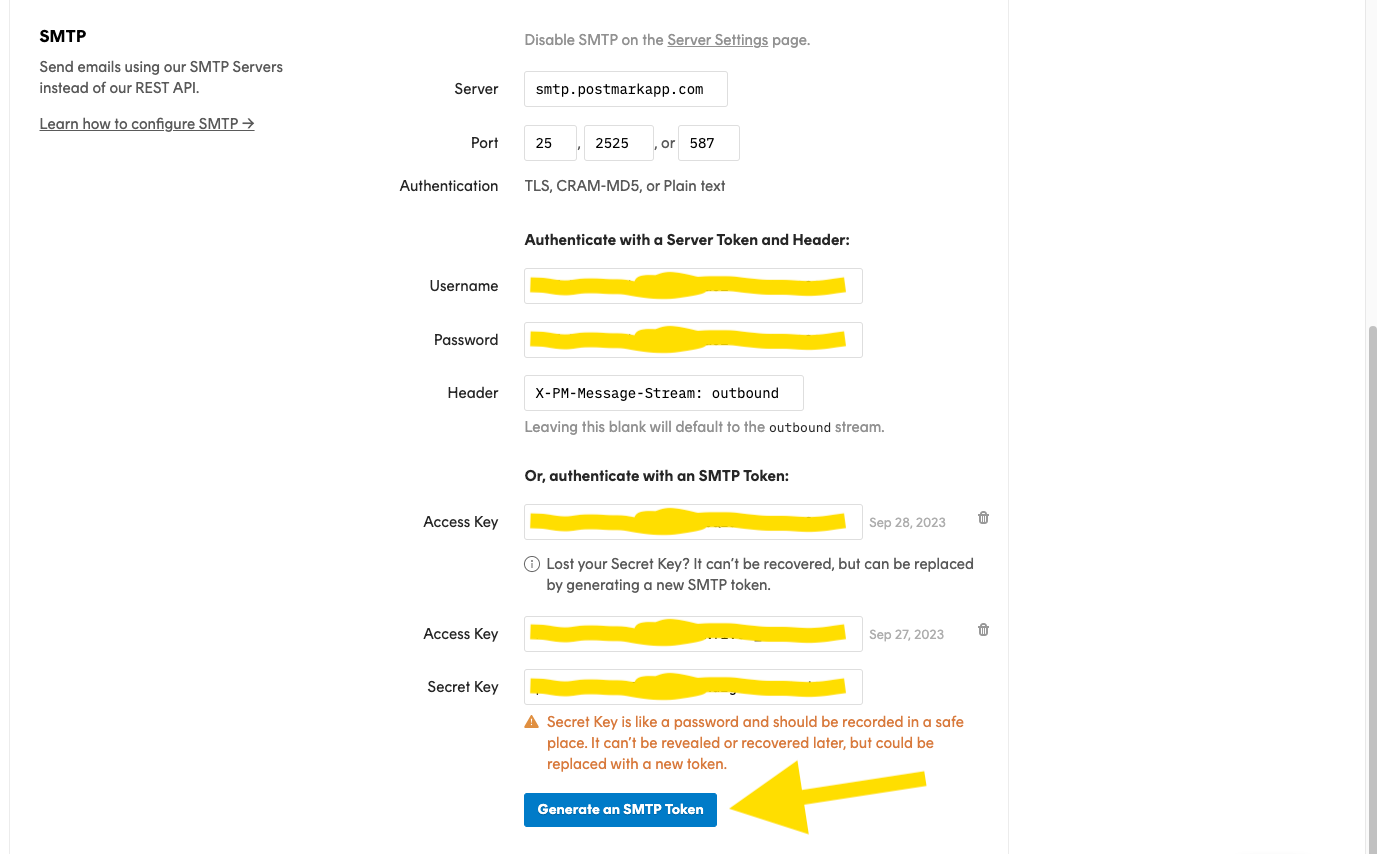
Create your SMTP Tokens. Navigate to the Message Stream you’re looking to use for your Mastodon emails and navigate to your Stream’s settings. Here you’ll find the option to create an SMTP Token, consisting of an Access Key and Secret Key, which are unique to that Stream.
Once you have your Postmark account and Sender Signature set up then you are ready to configure the SMTP server in Mastodon. Mastodon uses Environment Variables to store configuration values for your instance. These are stored in a file called .env.production, which typically exists in the Mastodon root directory.
Depending on how you normally access your Mastodon instance, there are several different ways to modify the required environment variables. If you are using a one-click installer, you will likely be prompted for many of these values as part of the set-up process. If you already have a running Mastodon instance, access it as normal. Due to the multitude of options when it comes to hosting Mastodon, we recommend consulting your host's documentation for specific details on modifying environment variables in your host's environment.
To use Postmark with Mastodon, you will need to modify the following SMTP environment variables:
SMTP_SERVER="smtp.postmarkapp.com"
SMTP_PORT="587"
SMTP_LOGIN="{Your Postmark SMTP Token Access Key found in the Outbound Settings page for your Message Stream}"
SMTP_PASSWORD="{Your Postmark SMTP Token Secret Key found in the Outbound Settings page for your Message Stream}"
SMTP_FROM_ADDRESS="{Postmark Sender Signature verified email address}"
SMTP_ENABLE_STARTTLS="always"
Once these settings have been configured, your Mastodon instance is ready to send email! Messages sent by your Mastodon instance will start appearing in the Activity feed for your Message Stream in the Postmark dashboard. You can use this feed to view recent data about the Messages processing through your server, including successful and failed message deliveries.
Learn why the Mastodon team counts on Postmark to power their important transactional emails →
